Procedurally Generating Puzzles With Openscad And Python
28 December 2019
This post describes a project in which I used OpenSCAD and Python to create a randomly generated puzzle cube.

I wrote this code as an exercise in procedurally generating 3D-printable objects. The algorithm creates six pieces that fit together to form a cube. Since the puzzle is randomly generated, even the puzzle’s creator can have the satisfaction of solving it for themselves!
The algorithm
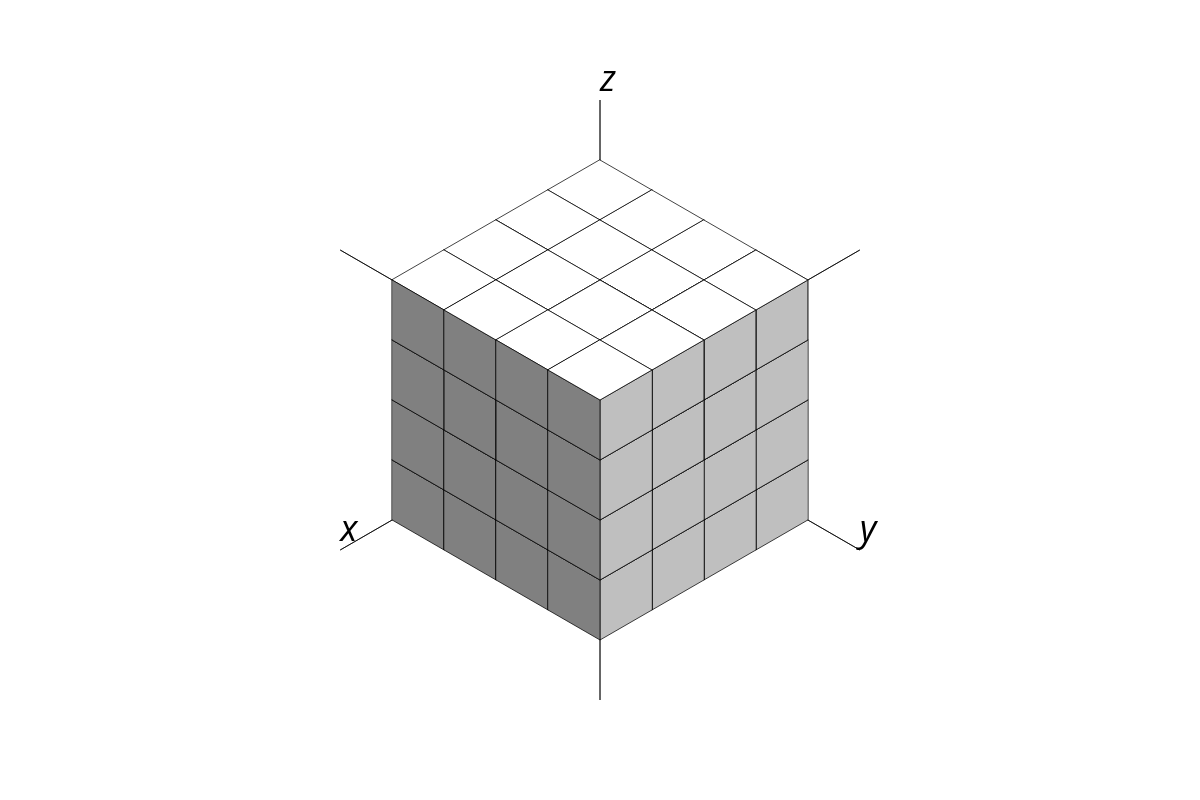
The algorithm starts with an array of zeros the same shape as the completed puzzle. Suppose our puzzle is a cube with sides of length 4, then it can be visualised like this:
Faces
Each face of the puzzle cube must be numbered. The numbers themselves don’t matter as long as they are non-zero and unique. The value of array elements in the centre of each face can be set straight away since there is only one puzzle piece that they can belong to. Edge and corner elements can be ignored for now. We can use colours to represent each face’s value:
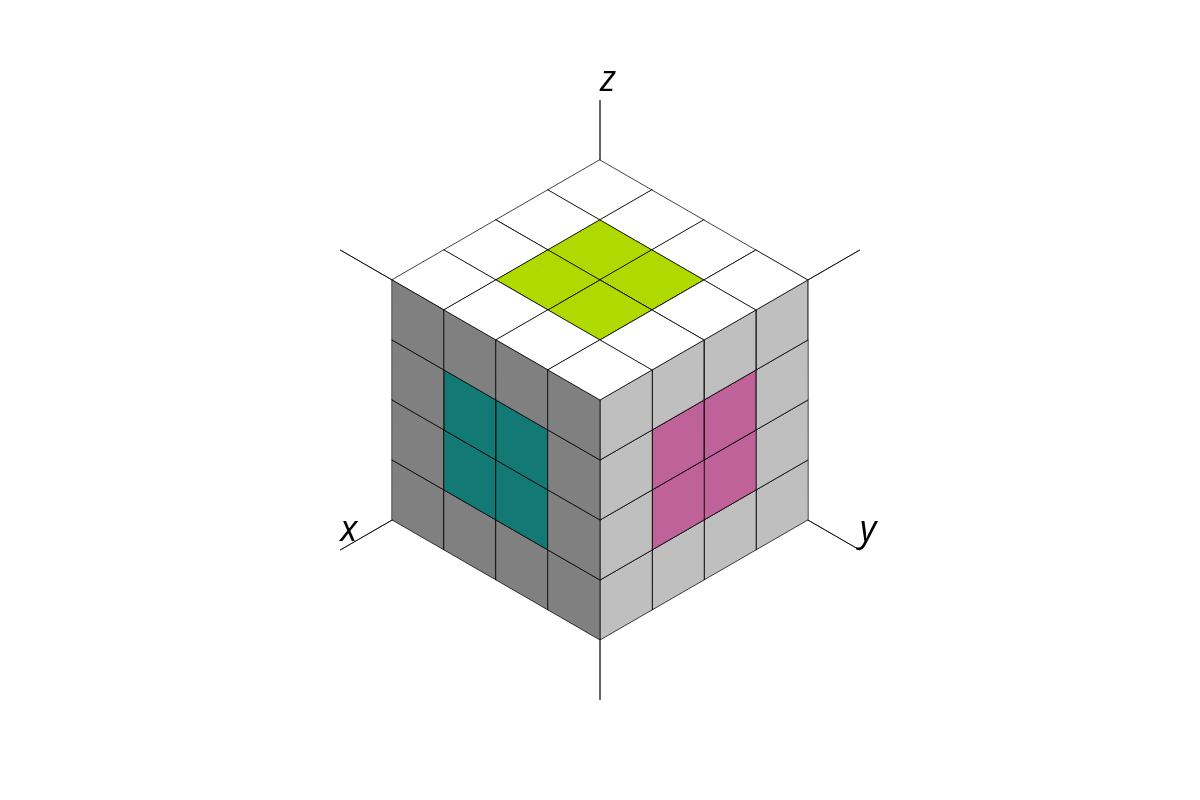
White voxels represent elements that are not necessarily zero, but with a value that has yet to be finalised. Everything described so far can be done (using numpy) with the following lines of code:
import numpy as np
x, y, z = shape
face_values = (1, 2), (3, 4), (5, 6)
array = np.pad(np.zeros((x - 2, y - 2, z - 2)), 1,
    constant_values=face_values)
Edges
The edges of the puzzle are the interesting part — the way they fit together is what makes it a puzzle at all! Along each edge of the puzzle, element values must be chosen at random. There are only two possible values that they can take: the values of the faces that meet at the edge.
Since the puzzle is a cube, there are 12 edges to be considered. We can iterate through them by first considering each of the 3 axes (x, y, and z). For each axis, we then consider the index extremes of the other two (denoted in python as 0 and -1), iterating through all 4 possible combinations. The final trick is using numpy’s random choice function and indexing to give values to each edge all at once! The code for this is provided below:
from itertools import product
for axis in range(3):
    ends = 3*[(0, -1)]
    ends[axis] = (slice(None),)
    for idx in product(*ends):
        array[idx] = np.random.choice((
            face_values[axis - 1][idx[axis - 1]],
            face_values[axis - 2][idx[axis - 2]],
        ), shape[axis])
After all edge values have been chosen, the array should look something like this:
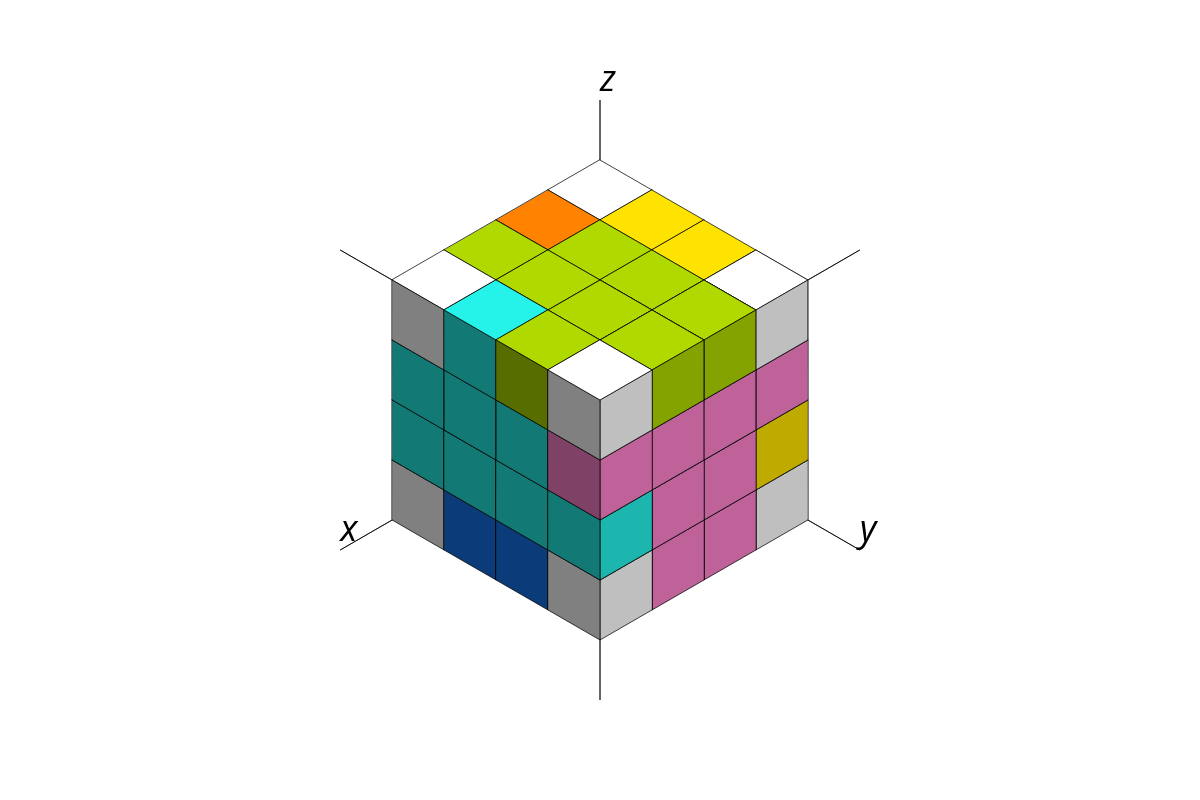
Corners
Finally, we need to give values to the array’s corner elements. But hang on, weren’t the corners given random values in the last step? Why are those values not good enough? There are two reasons. The last step only considered the values of two faces that meet at each edge, while at a corner there are three. But, more importantly, it is currently possible for a corner element to be disconnected from its face! Consider the following example:
The element in the top left corner is not connected to the rest of the green-coloured face! To solve this, we must choose the value of each corner randomly from the values of neighbouring elements. This ensures that each corner remains connected to a puzzle piece.
In the code, we visit each of the 8 corners by again considering the index extremes of each axis. A delta array provides a way of getting the values of all neighbouring elements. A python set is used to remove duplicates, ensuring that having two neighbours of the same value doesn’t double the probability of that value being chosen, although this is not strictly necessary. The code is as follows:
for idx in product((0, -1), (0, -1), (0, -1)):
    delta = np.copysign(np.eye(3), idx).astype(np.int)
    array[idx] = np.random.choice(
        list(set(array[tuple(idx + i)] for i in delta)))
By now the array should look like this:
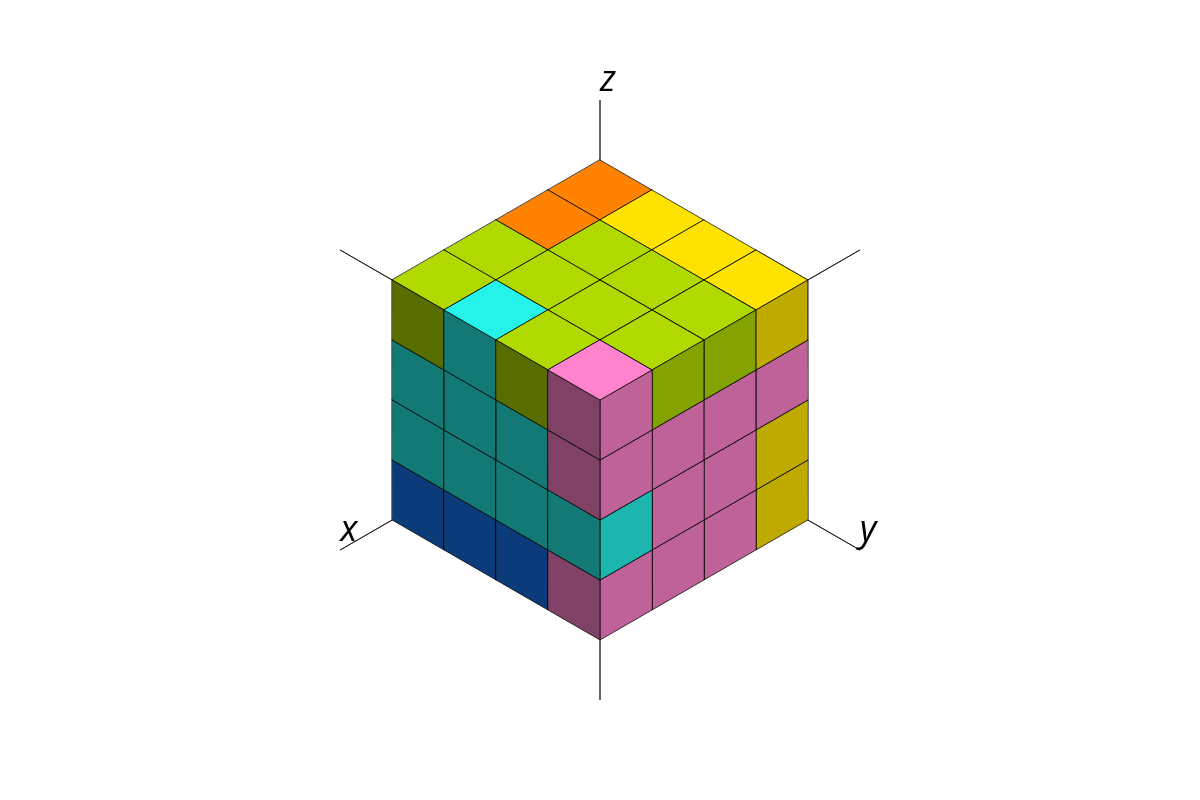
A complete puzzle!
Creating 3D objects
Getting each face
From here, getting the shape of each piece is a simple as checking each face for elements containing that face’s value. This will produce a boolean array to represent each piece, with true values where the piece is to be filled and false where there are to be gaps. We store the boolean arrays in a list.
faces = []
for n, (axis, end) in enumerate(product(range(3), (0, -1))):
    idx = 3*[slice(None)]
    idx[axis] = end
    faces.append(array[tuple(idx)] == face_values[int(n/2)][n%2])
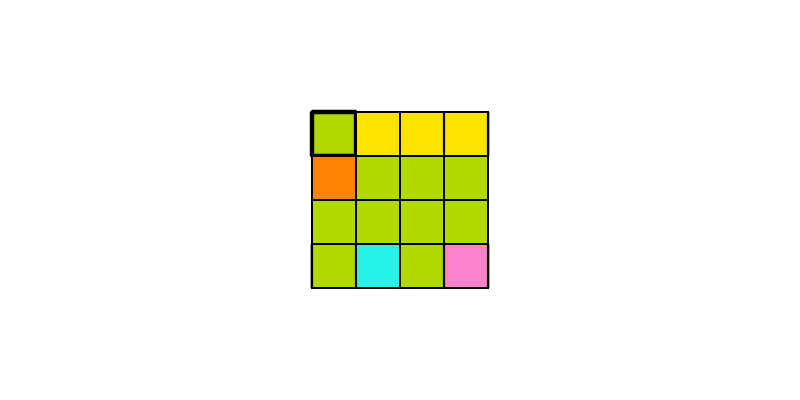
At this point, the green face in our example looks like this:
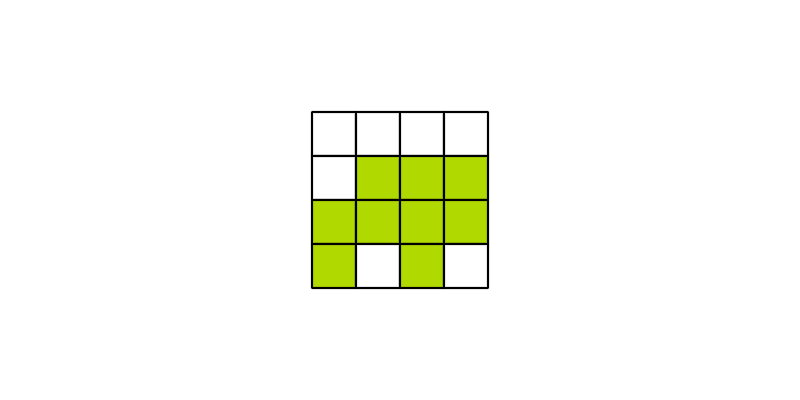
… which would be represented as:
array([[False, False, False, False],
       [False,  True,  True,  True],
       [ True,  True,  True,  True],
       [ True, False,  True, False]])
Converting each face into a 3D object
The simplest way to convert boolean arrays into solid, 3D-printable objects as to place a cube at each true value’s coordinate. In general, however, we can use any shape as our puzzle element. For example, using solidpython, we can define a python function called element that generates a cube with rounded edges:
from solid import *
from solid.utils import *
def element(x, y, size, r=1, tol=.2, segments=32):
    return translate([size*x, size*y, 0])(hull()(
        tuple(translate([i, j, k])(sphere(r, segments=segments))
            for i, j, k in product(*3*[(r+tol, size-r-tol)]))))
The shape produced by element is slightly diminished so that the puzzle pieces fit together easily. Because of this, we will need a simple connector object too:
def connector(x, y, size, r=1, tol=.2):
    return translate([size*x+r+tol, size*y+r+tol, r+tol])(cube(size-2*(r+tol)))
We can use these functions to define each piece as follows:
pieces = []
for n, face in enumerate(faces):
    pieces.append(union())
    for i, row in enumerate(face):
        for j, value in enumerate(row):
            if value:
                pieces[-1] += element(i, j, size)
                if i and face[i-1][j]: pieces[-1] += connector(i-.5, j, size)
                if j and face[i][j-1]: pieces[-1] += connector(i, j-.5, size)
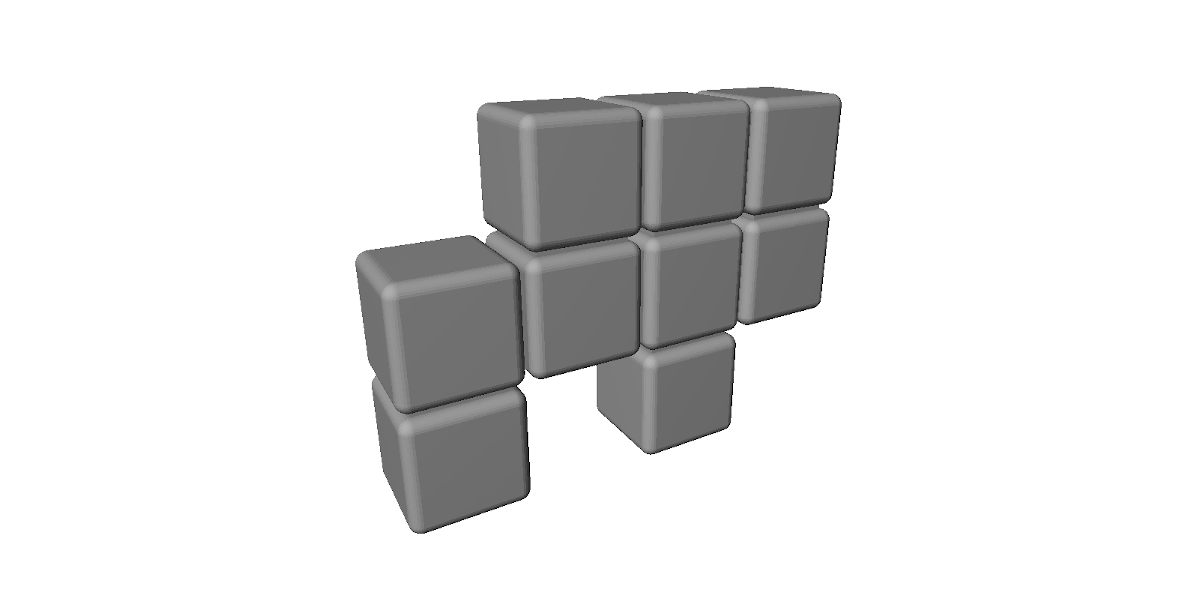
The list named pieces now contains solidpython objects that describe the 3D geometry of our puzzle pieces! Revisiting the green face from our example, the generated piece would look like this:
Saving each piece
Solidpython provides a function called scad_render_to_file, which creates OpenSCAD code from our solidpython objects. Combining this with an optional call to OpenSCAD’s CLI, we have a function for saving pieces as STL files, directly from python!
from subprocess import call
from os import remove
def save(obj, name, stl=False):
    scad_render_to_file(obj, name + '.scad')
    if stl:
        call(['openscad', name + '.scad', '-o', name + '.stl'])
        remove(name + '.scad')
Let’s use this on each piece.
for n, piece in enumerate(pieces):
    save(piece, 'piece_' + str(n), stl=True)
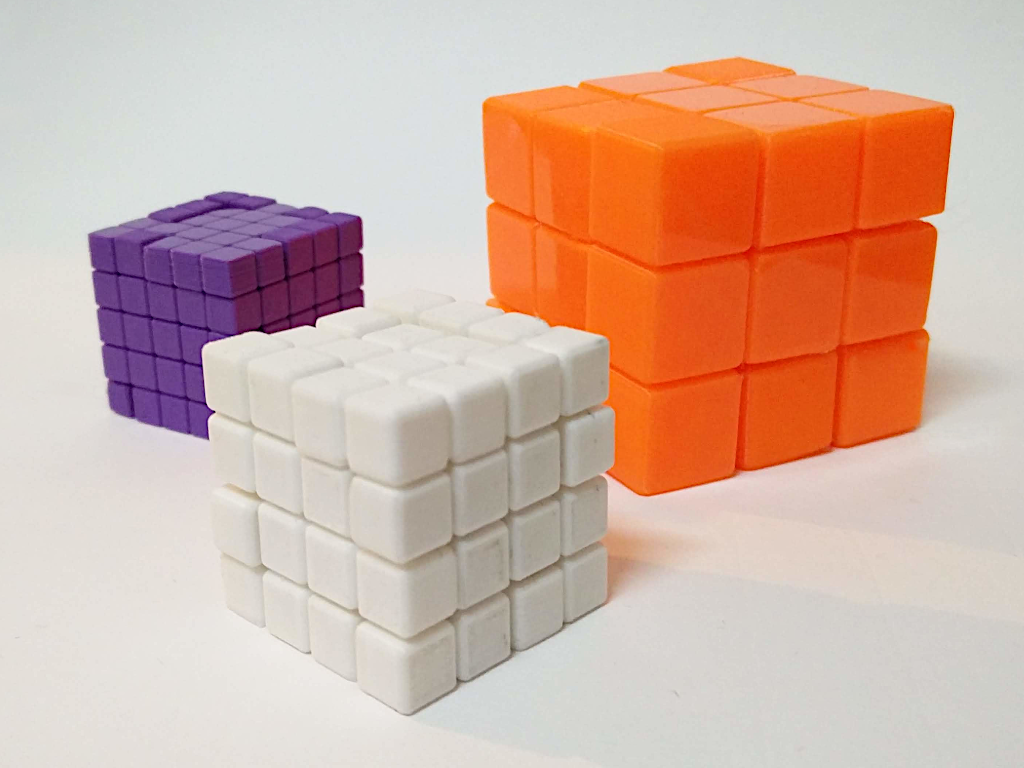
3D-printing
Each generated piece prints flat and without supports or a raft.
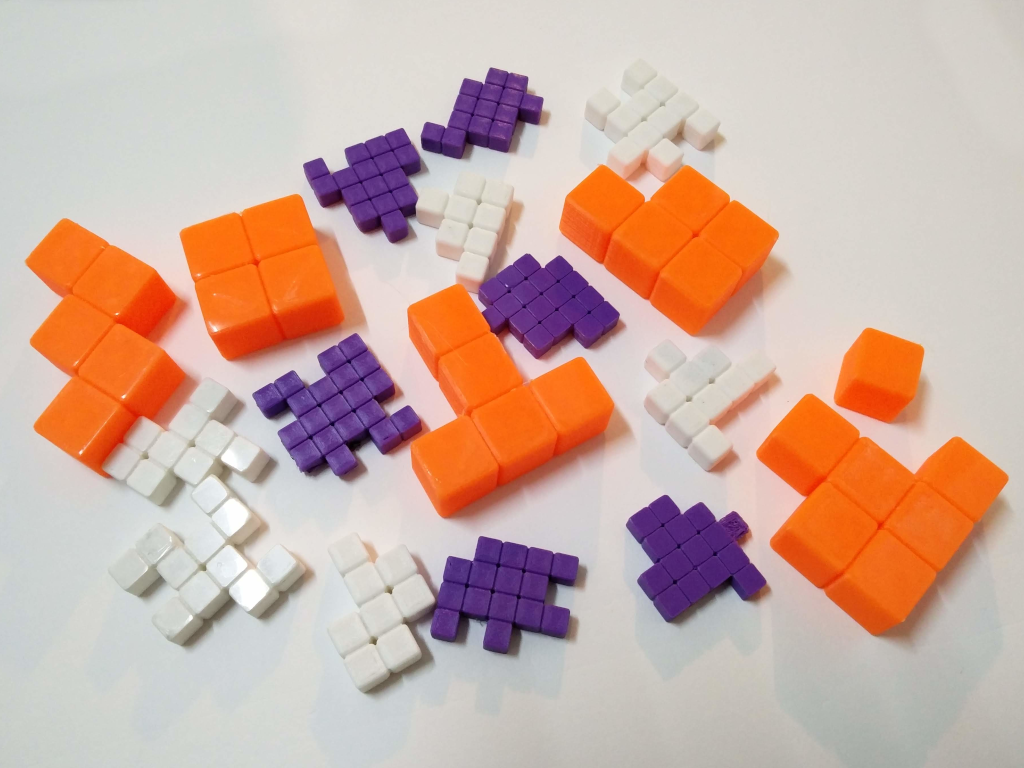
I experimented with 3×3×3, 4×4×4 and 5×5×5 cubes. 4×4×4 seems to be the sweet spot in difficulty, with smaller sides causing puzzles to have multiple solutions and larger sides making the solution too obvious.
Do it yourself
- Clone or download the code from github:
https://github.com/keeeal/puzzle-cube
- Install the prerequisites:
pip install solidpython numpy
- Run the program:
python puzzle_cube.py [--size SIZE] [--shape X Y Z] [--stl]
optional arguments:
- size — The size-length of a single cell in the puzzle. Default: 10 mm.
- shape — The dimensions of the puzzle. Default: (4, 4, 4)
- stl — Attempt to generate STL rather than SCAD files. (Requires the OpenSCAD)